As my family and friends know I have been making an almost yearly ornament/window hanging since 1996 (I've missed two or maybe it's three years.). Since a number of those people read this blog I'm not going to put much about this year's creation here. Suffice it to say that the planning has begun and I don't want to spoil the surprise.
If you are not on my gift list and would like a window into the process of creating these you can follow the progress here. Those of you who are on the list, and you know who you are, do NOT follow the link. Ruining the surprise will not make you happy, it will only ruin the surprise.
Saturday, October 13, 2007
Thursday, October 11, 2007
Softball Bats Done
 I finished the softball bats at class tonight. The last steps were burnishing using a dog chew bone, then oiling while the lathe was running, and then using handfuls of shavings to polish.
After removing the bats from the lathe the extra material was removed from each end with the band saw. A little sanding and some more oil finished them off.
Saturday, October 6, 2007
Softball Bats, Almost Done
Last spring the guys in my woodworking class got into making baseball bats. I'm not sure how it started, but 5 people including the instructor cranked out at least 1 bat. Towards the end of this the instructor mentioned that I was the one who should be making a bat since I actually play softball. At the time I was busy with other things.
Usually I take the summer off from class since I spend so much time with softball (playing, umpiring, scheduling umpires). This summer I decided it was worth the fairly low cost to have the shop available for as many nights as I could get there, so I signed up for the class. I spent most of the time working on Hiker Boy's advent calendar. I finished up the tasks I wanted to do on the advent calendar and still had a class and a half left. I didn't want to start another project, I've got more than enough waiting for completion, so I decided to give turning a bat a try.
First step was to mill blanks. This started with big slabs of ash about 4" x 10" x 3'. With help, that sucker was heavy, I cut 2 blanks about 4" square by 3' long. To make things easier on the lathe we set the blade on the table saw to 45 degrees and cut off the corners on the long edges.
This left something that looked like this:
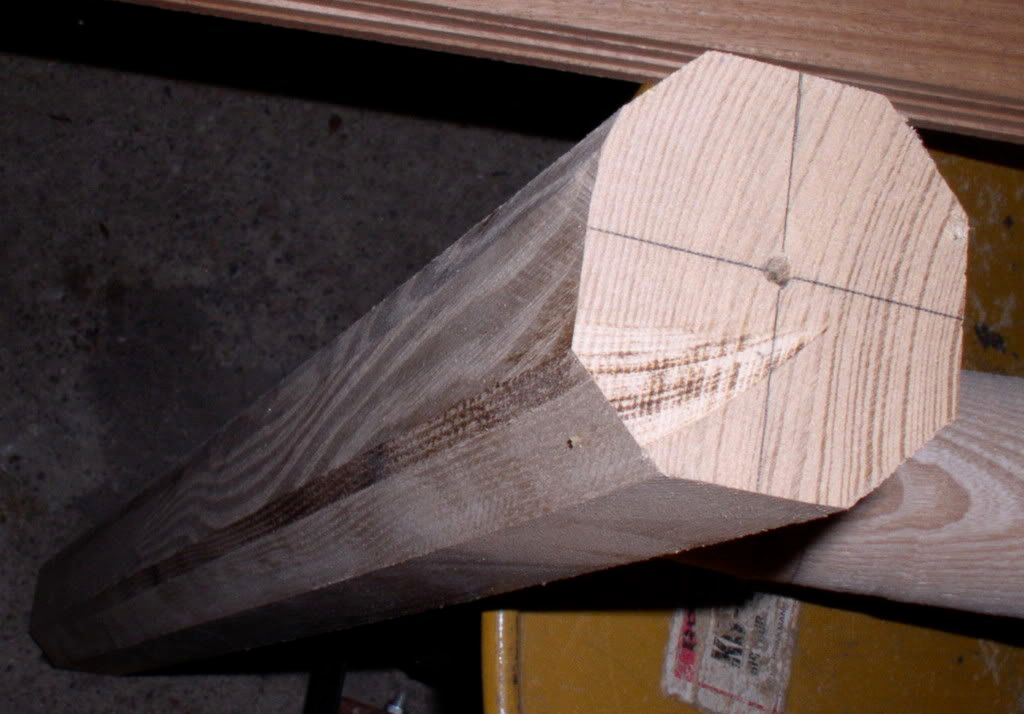
Before heading to the lathe we used a saw to cut shallow grooves on one end of the blank, where you see the lines in the picture.
First step on the lathe was to create a cylinder. This is fairly simple but messy work. I ended up with wood chips, and saw dust everywhere including down my shirt. Once I had the wood worked into a cylinder it was time to start the real work. First step was to mark the locations of diameter changes. Using my favorite aluminum bat I measured out where the barrel ended and the taper began, the length of the handle and the width of the knob. I had to shorten the wooden bat slightly because the piece of wood was slightly shorter. It's only about an inch difference, not a major issue.
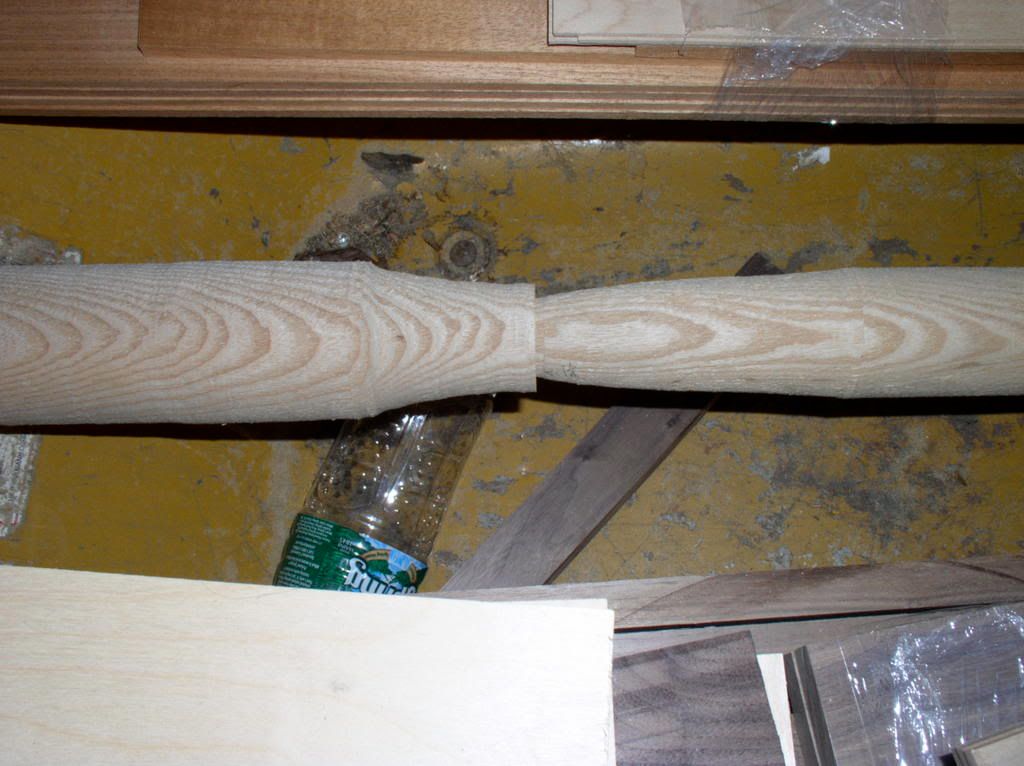 Using a parting tool I made incisions to mark the transition points. Then using a variety of tools I set to work on trimming the barrel to the desired thickness, and creating the taper. I ran out of time partway through. The picture on the left is the first bat with the barrel created and the taper roughed out and a lot of wood left to remove on the handle (left) end.
It was about two months before I got back to the bat. During week one of fall classes I finished off the first bat. After finishing off the construction - thinning out the handle, creating the knob and rounding over the edges of the knob and the end of the barrel - it was time for smoothing. A short round with a couple of files, and three grits of sand paper and the bat was almost done. (I thought I was a mess with all the wood chips I acquired it the turning - sanding just took that to a whole new level.) The knob is a little small, and there are a couple of nicks in the wood but it turned out (no pun intended) pretty good for my first try.
I had made 2 blanks, so I set off on bat number 2 as soon as bat 1 got to this point. By the time I left class on that first night of the fall session I had not only the mostly complete bat 1, but the cylinder for bat 2.
Thursday night I got back to work on bat 2. The steps were the same. The difference was a little more confidence and a little more patience. Bat number 2 is a little better than bat 1. The knob is the correct size, the handle is a little thicker (on purpose) and there are no nicks.
Next week I'll work on burnishing and finishing the bats, and separating them from the excess bits that allow them to be inserted into the lathe.
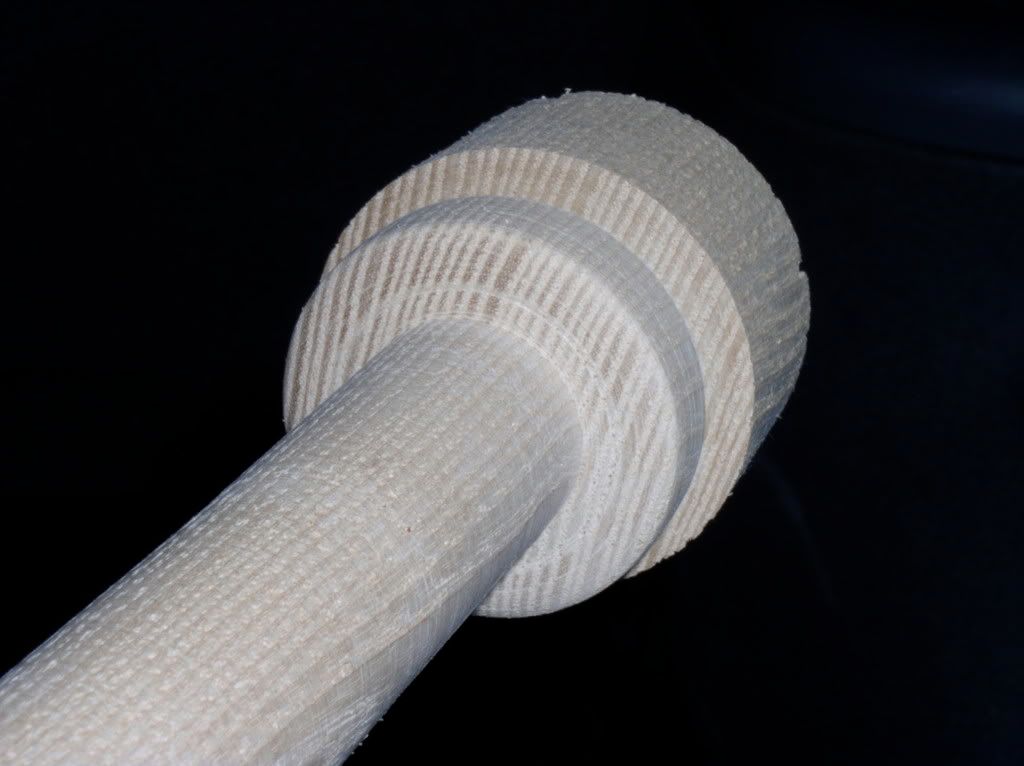
This is the knob on bat 2.
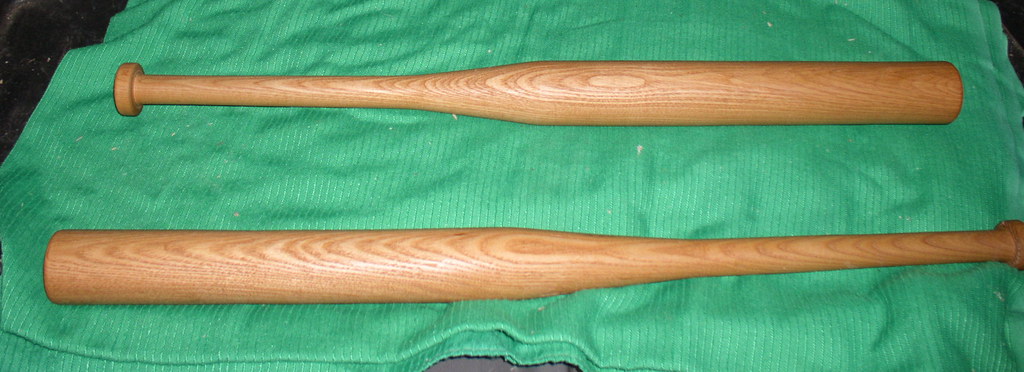
 The two bats resting in my wheelbarrow. The lower bat is the first bat. If you click on the picture you can see one of the nicks near the taper.
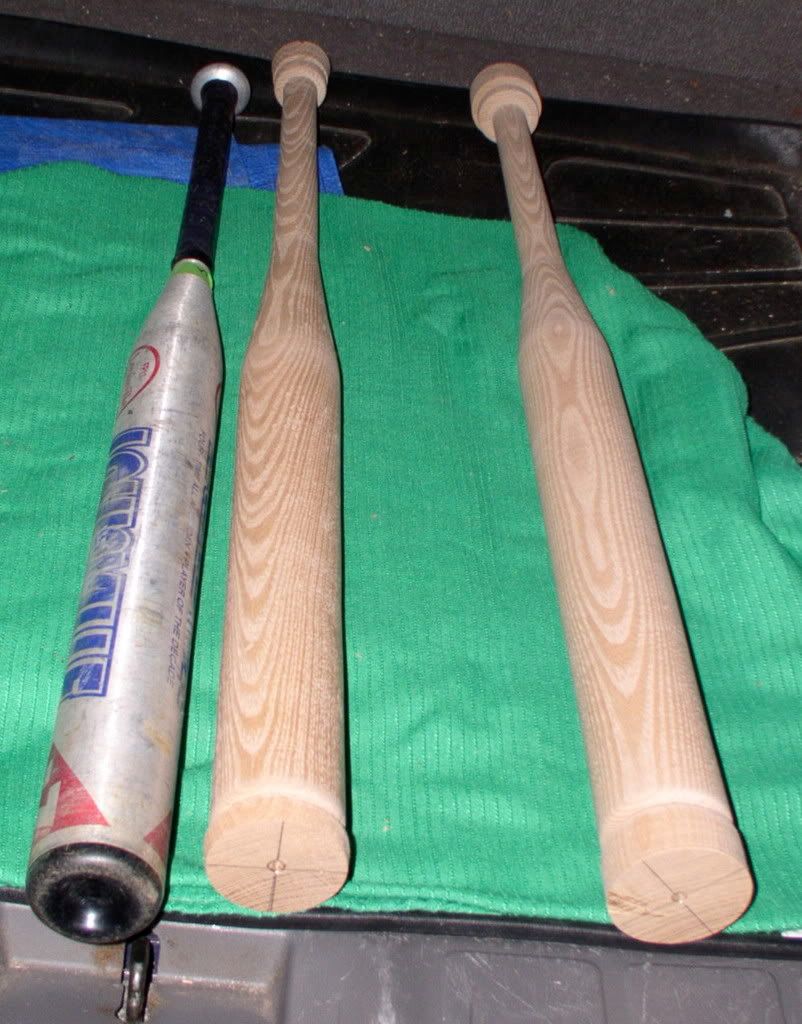
Here are both bats sitting next to the aluminum bat they are patterned after. Bat 1 is in the middle.
Glossary (definitions from dictionary.com)
lathe - a machine for use in working wood, metal, etc., that holds the material and rotates it about a horizontal axis against a tool that shapes it.
Gouge - a chisel having a partly cylindrical blade with the bevel on either the concave or the convex side. Note: the link is to a stone for sharpening a gouge but it includes a good picture of a gouge.
parting tool - a thin tool, used in turning or planing, for cutting a piece in two.
Here is a picture of a small collection of turning tools.
Usually I take the summer off from class since I spend so much time with softball (playing, umpiring, scheduling umpires). This summer I decided it was worth the fairly low cost to have the shop available for as many nights as I could get there, so I signed up for the class. I spent most of the time working on Hiker Boy's advent calendar. I finished up the tasks I wanted to do on the advent calendar and still had a class and a half left. I didn't want to start another project, I've got more than enough waiting for completion, so I decided to give turning a bat a try.
First step was to mill blanks. This started with big slabs of ash about 4" x 10" x 3'. With help, that sucker was heavy, I cut 2 blanks about 4" square by 3' long. To make things easier on the lathe we set the blade on the table saw to 45 degrees and cut off the corners on the long edges.
This left something that looked like this:
Before heading to the lathe we used a saw to cut shallow grooves on one end of the blank, where you see the lines in the picture.
First step on the lathe was to create a cylinder. This is fairly simple but messy work. I ended up with wood chips, and saw dust everywhere including down my shirt. Once I had the wood worked into a cylinder it was time to start the real work. First step was to mark the locations of diameter changes. Using my favorite aluminum bat I measured out where the barrel ended and the taper began, the length of the handle and the width of the knob. I had to shorten the wooden bat slightly because the piece of wood was slightly shorter. It's only about an inch difference, not a major issue.
Using a parting tool I made incisions to mark the transition points. Then using a variety of tools I set to work on trimming the barrel to the desired thickness, and creating the taper. I ran out of time partway through. The picture on the left is the first bat with the barrel created and the taper roughed out and a lot of wood left to remove on the handle (left) end.It was about two months before I got back to the bat. During week one of fall classes I finished off the first bat. After finishing off the construction - thinning out the handle, creating the knob and rounding over the edges of the knob and the end of the barrel - it was time for smoothing. A short round with a couple of files, and three grits of sand paper and the bat was almost done. (I thought I was a mess with all the wood chips I acquired it the turning - sanding just took that to a whole new level.) The knob is a little small, and there are a couple of nicks in the wood but it turned out (no pun intended) pretty good for my first try.
I had made 2 blanks, so I set off on bat number 2 as soon as bat 1 got to this point. By the time I left class on that first night of the fall session I had not only the mostly complete bat 1, but the cylinder for bat 2.
Thursday night I got back to work on bat 2. The steps were the same. The difference was a little more confidence and a little more patience. Bat number 2 is a little better than bat 1. The knob is the correct size, the handle is a little thicker (on purpose) and there are no nicks.
Next week I'll work on burnishing and finishing the bats, and separating them from the excess bits that allow them to be inserted into the lathe.
This is the knob on bat 2.
The two bats resting in my wheelbarrow. The lower bat is the first bat. If you click on the picture you can see one of the nicks near the taper.Here are both bats sitting next to the aluminum bat they are patterned after. Bat 1 is in the middle.
Glossary (definitions from dictionary.com)
lathe - a machine for use in working wood, metal, etc., that holds the material and rotates it about a horizontal axis against a tool that shapes it.
Gouge - a chisel having a partly cylindrical blade with the bevel on either the concave or the convex side. Note: the link is to a stone for sharpening a gouge but it includes a good picture of a gouge.
parting tool - a thin tool, used in turning or planing, for cutting a piece in two.
Here is a picture of a small collection of turning tools.
Subscribe to:
Posts (Atom)