Showing posts with label progress. Show all posts
Showing posts with label progress. Show all posts
Sunday, November 4, 2007
Elf Business Update
I spent sometime today working on this year's ornament. If you're on the list to get one (you know who you are) don't peek. Anyone else can see the update here.
Saturday, October 13, 2007
Elf Business
As my family and friends know I have been making an almost yearly ornament/window hanging since 1996 (I've missed two or maybe it's three years.). Since a number of those people read this blog I'm not going to put much about this year's creation here. Suffice it to say that the planning has begun and I don't want to spoil the surprise.
If you are not on my gift list and would like a window into the process of creating these you can follow the progress here. Those of you who are on the list, and you know who you are, do NOT follow the link. Ruining the surprise will not make you happy, it will only ruin the surprise.
If you are not on my gift list and would like a window into the process of creating these you can follow the progress here. Those of you who are on the list, and you know who you are, do NOT follow the link. Ruining the surprise will not make you happy, it will only ruin the surprise.
Saturday, October 6, 2007
Softball Bats, Almost Done
Last spring the guys in my woodworking class got into making baseball bats. I'm not sure how it started, but 5 people including the instructor cranked out at least 1 bat. Towards the end of this the instructor mentioned that I was the one who should be making a bat since I actually play softball. At the time I was busy with other things.
Usually I take the summer off from class since I spend so much time with softball (playing, umpiring, scheduling umpires). This summer I decided it was worth the fairly low cost to have the shop available for as many nights as I could get there, so I signed up for the class. I spent most of the time working on Hiker Boy's advent calendar. I finished up the tasks I wanted to do on the advent calendar and still had a class and a half left. I didn't want to start another project, I've got more than enough waiting for completion, so I decided to give turning a bat a try.
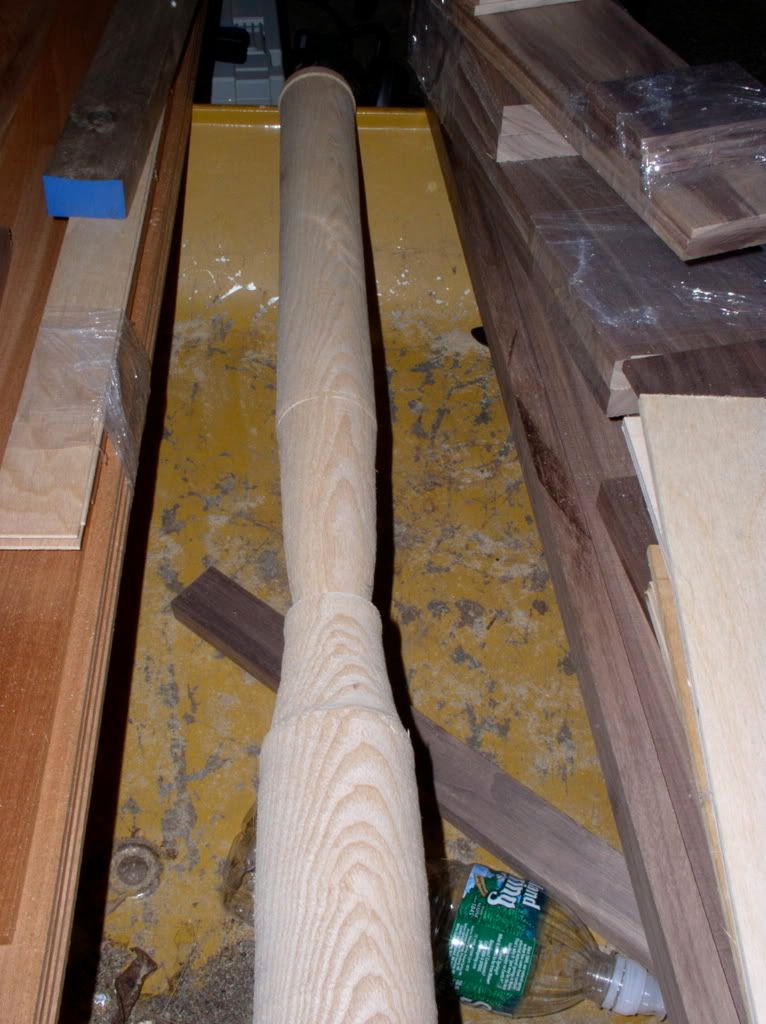
First step was to mill blanks. This started with big slabs of ash about 4" x 10" x 3'. With help, that sucker was heavy, I cut 2 blanks about 4" square by 3' long. To make things easier on the lathe we set the blade on the table saw to 45 degrees and cut off the corners on the long edges.
This left something that looked like this:
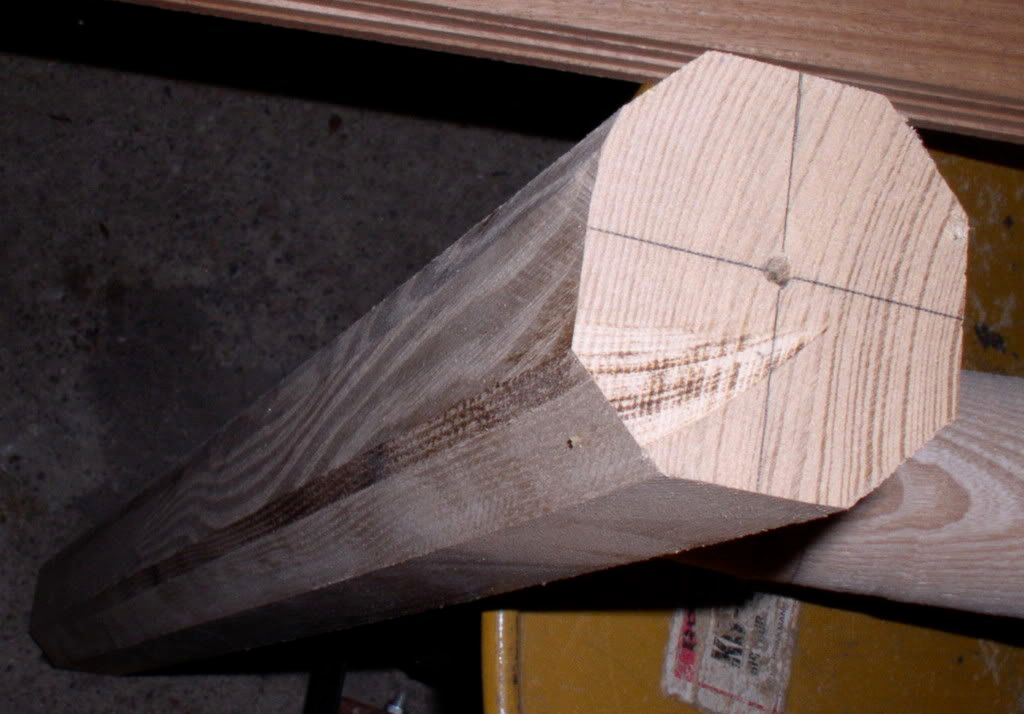
Before heading to the lathe we used a saw to cut shallow grooves on one end of the blank, where you see the lines in the picture.
First step on the lathe was to create a cylinder. This is fairly simple but messy work. I ended up with wood chips, and saw dust everywhere including down my shirt. Once I had the wood worked into a cylinder it was time to start the real work. First step was to mark the locations of diameter changes. Using my favorite aluminum bat I measured out where the barrel ended and the taper began, the length of the handle and the width of the knob. I had to shorten the wooden bat slightly because the piece of wood was slightly shorter. It's only about an inch difference, not a major issue.
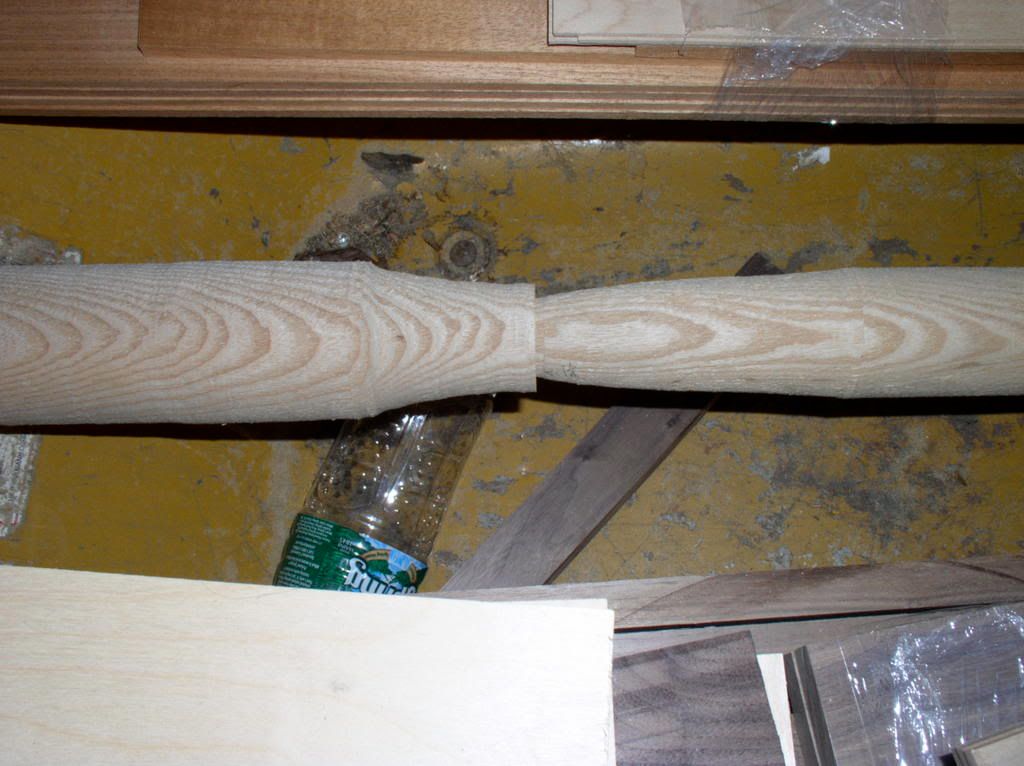 Using a parting tool I made incisions to mark the transition points. Then using a variety of tools I set to work on trimming the barrel to the desired thickness, and creating the taper. I ran out of time partway through. The picture on the left is the first bat with the barrel created and the taper roughed out and a lot of wood left to remove on the handle (left) end.
It was about two months before I got back to the bat. During week one of fall classes I finished off the first bat. After finishing off the construction - thinning out the handle, creating the knob and rounding over the edges of the knob and the end of the barrel - it was time for smoothing. A short round with a couple of files, and three grits of sand paper and the bat was almost done. (I thought I was a mess with all the wood chips I acquired it the turning - sanding just took that to a whole new level.) The knob is a little small, and there are a couple of nicks in the wood but it turned out (no pun intended) pretty good for my first try.
I had made 2 blanks, so I set off on bat number 2 as soon as bat 1 got to this point. By the time I left class on that first night of the fall session I had not only the mostly complete bat 1, but the cylinder for bat 2.
Thursday night I got back to work on bat 2. The steps were the same. The difference was a little more confidence and a little more patience. Bat number 2 is a little better than bat 1. The knob is the correct size, the handle is a little thicker (on purpose) and there are no nicks.
Next week I'll work on burnishing and finishing the bats, and separating them from the excess bits that allow them to be inserted into the lathe.
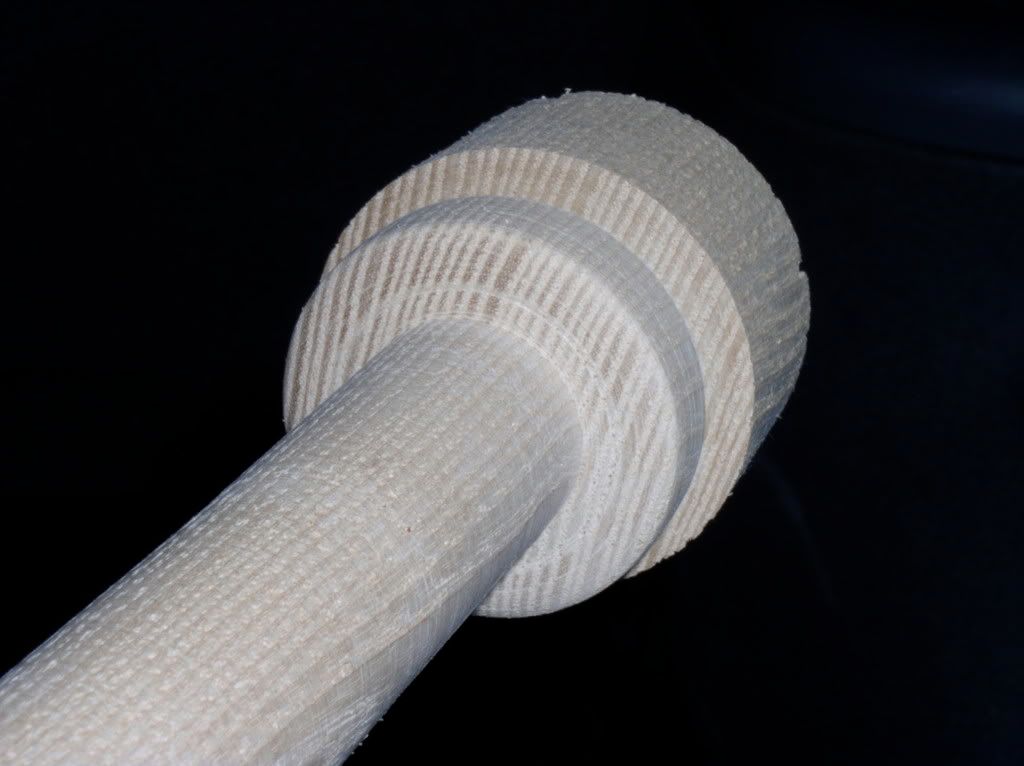
This is the knob on bat 2.
 The two bats resting in my wheelbarrow. The lower bat is the first bat. If you click on the picture you can see one of the nicks near the taper.
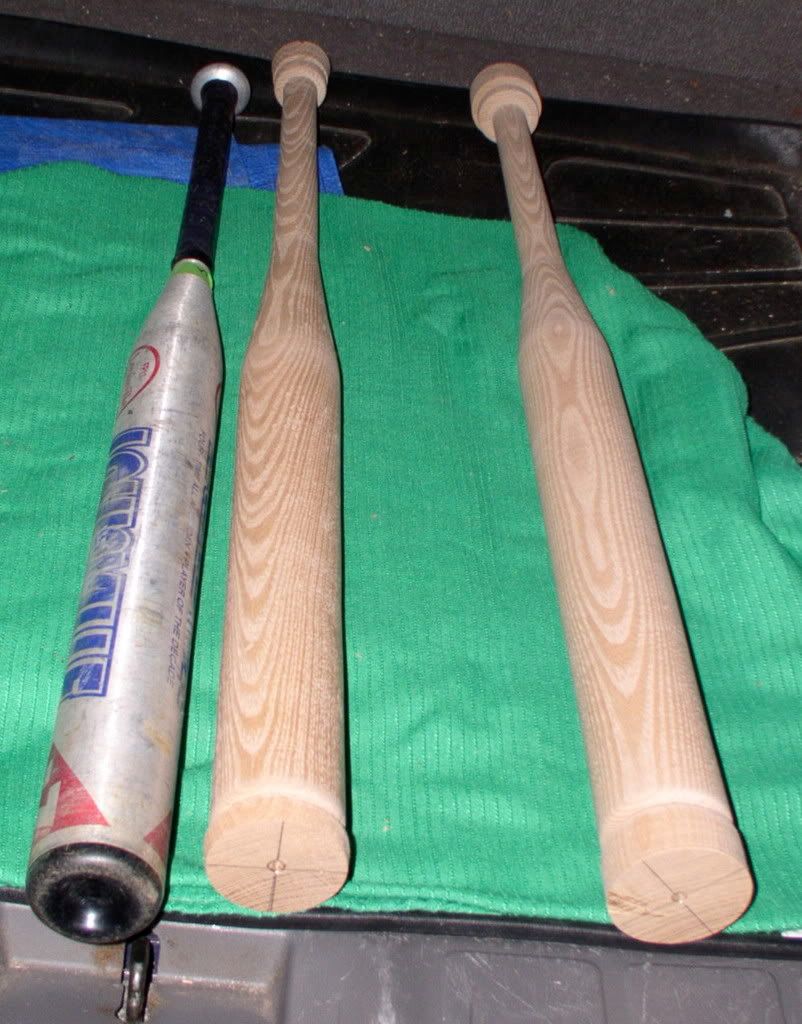
Here are both bats sitting next to the aluminum bat they are patterned after. Bat 1 is in the middle.
Glossary (definitions from dictionary.com)
lathe - a machine for use in working wood, metal, etc., that holds the material and rotates it about a horizontal axis against a tool that shapes it.
Gouge - a chisel having a partly cylindrical blade with the bevel on either the concave or the convex side. Note: the link is to a stone for sharpening a gouge but it includes a good picture of a gouge.
parting tool - a thin tool, used in turning or planing, for cutting a piece in two.
Here is a picture of a small collection of turning tools.
Usually I take the summer off from class since I spend so much time with softball (playing, umpiring, scheduling umpires). This summer I decided it was worth the fairly low cost to have the shop available for as many nights as I could get there, so I signed up for the class. I spent most of the time working on Hiker Boy's advent calendar. I finished up the tasks I wanted to do on the advent calendar and still had a class and a half left. I didn't want to start another project, I've got more than enough waiting for completion, so I decided to give turning a bat a try.
First step was to mill blanks. This started with big slabs of ash about 4" x 10" x 3'. With help, that sucker was heavy, I cut 2 blanks about 4" square by 3' long. To make things easier on the lathe we set the blade on the table saw to 45 degrees and cut off the corners on the long edges.
This left something that looked like this:
Before heading to the lathe we used a saw to cut shallow grooves on one end of the blank, where you see the lines in the picture.
First step on the lathe was to create a cylinder. This is fairly simple but messy work. I ended up with wood chips, and saw dust everywhere including down my shirt. Once I had the wood worked into a cylinder it was time to start the real work. First step was to mark the locations of diameter changes. Using my favorite aluminum bat I measured out where the barrel ended and the taper began, the length of the handle and the width of the knob. I had to shorten the wooden bat slightly because the piece of wood was slightly shorter. It's only about an inch difference, not a major issue.
Using a parting tool I made incisions to mark the transition points. Then using a variety of tools I set to work on trimming the barrel to the desired thickness, and creating the taper. I ran out of time partway through. The picture on the left is the first bat with the barrel created and the taper roughed out and a lot of wood left to remove on the handle (left) end.It was about two months before I got back to the bat. During week one of fall classes I finished off the first bat. After finishing off the construction - thinning out the handle, creating the knob and rounding over the edges of the knob and the end of the barrel - it was time for smoothing. A short round with a couple of files, and three grits of sand paper and the bat was almost done. (I thought I was a mess with all the wood chips I acquired it the turning - sanding just took that to a whole new level.) The knob is a little small, and there are a couple of nicks in the wood but it turned out (no pun intended) pretty good for my first try.
I had made 2 blanks, so I set off on bat number 2 as soon as bat 1 got to this point. By the time I left class on that first night of the fall session I had not only the mostly complete bat 1, but the cylinder for bat 2.
Thursday night I got back to work on bat 2. The steps were the same. The difference was a little more confidence and a little more patience. Bat number 2 is a little better than bat 1. The knob is the correct size, the handle is a little thicker (on purpose) and there are no nicks.
Next week I'll work on burnishing and finishing the bats, and separating them from the excess bits that allow them to be inserted into the lathe.
This is the knob on bat 2.
The two bats resting in my wheelbarrow. The lower bat is the first bat. If you click on the picture you can see one of the nicks near the taper.Here are both bats sitting next to the aluminum bat they are patterned after. Bat 1 is in the middle.
Glossary (definitions from dictionary.com)
lathe - a machine for use in working wood, metal, etc., that holds the material and rotates it about a horizontal axis against a tool that shapes it.
Gouge - a chisel having a partly cylindrical blade with the bevel on either the concave or the convex side. Note: the link is to a stone for sharpening a gouge but it includes a good picture of a gouge.
parting tool - a thin tool, used in turning or planing, for cutting a piece in two.
Here is a picture of a small collection of turning tools.
Saturday, September 22, 2007
Summer Woodworking
My last post was over 2 months ago. Sorry about that. I have done a bit of woodworking since then, although not a lot. Among the other things taking up my time were:
Hiker Boy's Advent Calendar

The stock for all parts has been milled, and I'm ready to start joinery. The drawer stock still needs to be cut to final dimension. The picture above is the corner of one of the doors.
Softball Bat
This is a new addition to the list. Last spring many of the guys in my woodworking class made baseball bats. One evening as I was leaving the instructor commented that I was the one who should be making a bat. He's aware of my participation in the softball league at work (I help run our team, play, umpire and coordinate the umpires for the league). And when he found out that I'd never used a lathe he was even more convinced that I should give it a try. I didn't have anything else to work on for the last class, so I decided to give it a try. Here's the progress so far. I should have it mostly finished next week when class starts again.

Workbench Top
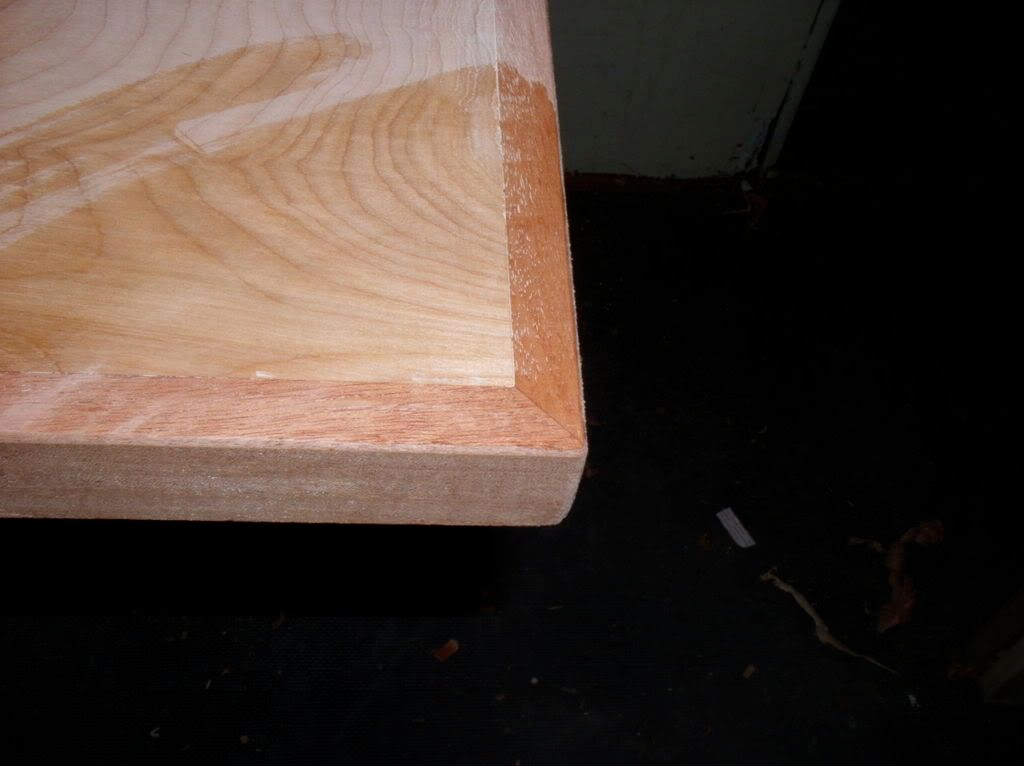
The new top for the bench is almost complete. I used mahogany to edge the plywood. It's attached using biscuits which gave me an excuse to use my biscuit joiner. I attached it so it was a little higher than the surface of the plywood and then planed it down. The only thing left to do is to apply a finish to it. I'm leaning toward using boiled linseed oil.
Footstools
I filled the grain on the footstools with a mixture of pumice and boiled linseed oil. They look great, but need a lot of sanding. I've got the top of one done and it feels great after the sanding.
Ornament
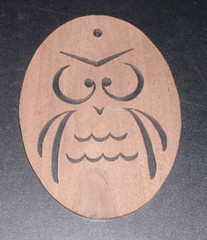
Almost every year for the last 10 I've made a window hanging/Christmas tree ornament using my scrollsaw. The one pictured above is from 2005. Much to Amy's amazement I have already got the first pass of this year's design done. I'll try this one out and then make adjustments before starting in on the production run.
- We dropped off Snowflake's nightlight and met the man himself - he's a real cutie.
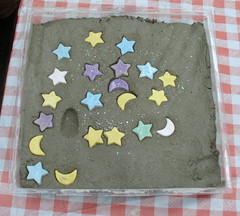
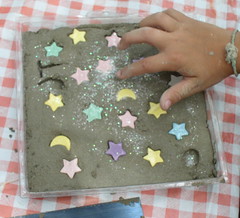
- I spent a couple of days on the Cape with my sister, her family, their friend and her son. One afternoon I supervised the boys D and JT making stepping stones (concrete, ceramic tiles and glitter). JT was particularly excited about the glitter. I didn't stay long enough to see the hardened stones, but word has it that the boys were fascinated by how the gloppy concrete turned into solid stones.
- We spent the last two weeks of July in the Adirondacks. We've vacationed there all but 2 of the last 12 years, the last 8 in Owl Cabin at Wakanda. Although I took some things to sand with me they never got pulled out. I did take photos and dimensions of an end table (a new addition to our cabin) which will likely end up as a project soon.
- Like too many other houses, our bathroom has a window above the tub. Since the tub is also used for showers the window gets wet. Over the years water has undermined the window framing, and the wall behind the plastic tub surround. The surround on our tub is several panels rather than a single piece. Over time the seams have lost their integrity and water has infiltrated. As embarrassing as it is to say this, the wall board behind the surround has been falling apart for years. After replacing the toilet and floor, we finally couldn't take it anymore. So in mid-August I carefully removed the surround and replaced the outside wall. Note to anyone reading - cardboard is not an acceptable shim in a bathroom wall! The job proved a little bit more involved than anticipated because the window trim was glued to the framing which meant that it all had to be replaced.
- Since returning from vacation work has been taking up a lot of time and more energy.
- I have been giving the kayak a good amount of time in the water.
Hiker Boy's Advent Calendar
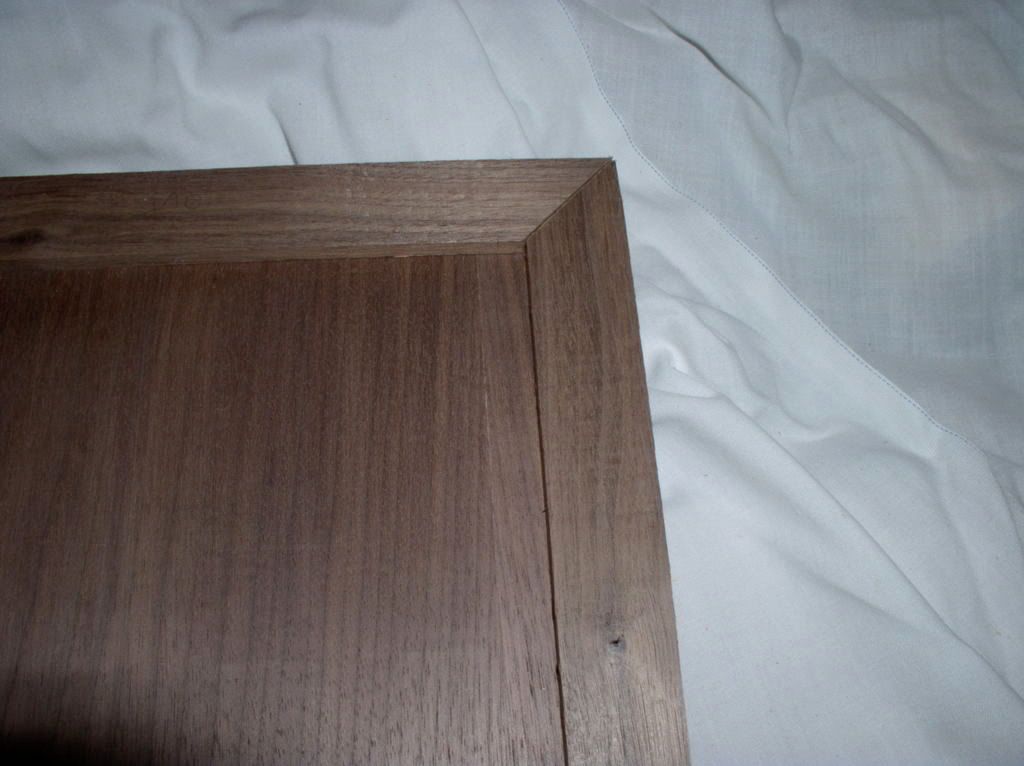
The stock for all parts has been milled, and I'm ready to start joinery. The drawer stock still needs to be cut to final dimension. The picture above is the corner of one of the doors.
Softball Bat
This is a new addition to the list. Last spring many of the guys in my woodworking class made baseball bats. One evening as I was leaving the instructor commented that I was the one who should be making a bat. He's aware of my participation in the softball league at work (I help run our team, play, umpire and coordinate the umpires for the league). And when he found out that I'd never used a lathe he was even more convinced that I should give it a try. I didn't have anything else to work on for the last class, so I decided to give it a try. Here's the progress so far. I should have it mostly finished next week when class starts again.
Workbench Top

The new top for the bench is almost complete. I used mahogany to edge the plywood. It's attached using biscuits which gave me an excuse to use my biscuit joiner. I attached it so it was a little higher than the surface of the plywood and then planed it down. The only thing left to do is to apply a finish to it. I'm leaning toward using boiled linseed oil.
Footstools
I filled the grain on the footstools with a mixture of pumice and boiled linseed oil. They look great, but need a lot of sanding. I've got the top of one done and it feels great after the sanding.
Ornament
Almost every year for the last 10 I've made a window hanging/Christmas tree ornament using my scrollsaw. The one pictured above is from 2005. Much to Amy's amazement I have already got the first pass of this year's design done. I'll try this one out and then make adjustments before starting in on the production run.
Friday, June 15, 2007
Current Work
I haven't been spending quite as much time in the shop since the challenge table was completed. What I have been working on is getting finish on the other projects which are ready for it.
First up is the nightlight since we don't want Snowflake to be a teenager before he gets it. I'm finishing it before I assemble it. I've got stain on all the parts. Next up is the finish coat. I'm going to go with polyurethane for that. I should get to this on Monday.
I've also done a little final sanding on the wall cabinet. I've also decided one of the doors needs a slight adjustment - it's rubbing on the bottom. That'll be a round of planing. Then I'll stain the walnut panels on the doors and the shelves which are also walnut. I think I'm going to finish it off with shellac.
Next up will be the foot stools. I've found a recipe for grain filler that uses pumice and boiled linseed oil. I've got the ingredients, just need to find a time to try it out. The grain needs to be filled because the hickory has open grain. Stay tuned for progress and pictures.
In class (Thursday nights till mid July) I've been working on hiker boy's advent calendar. Last week I remilled/recut the wood for the case. The design of this was still evolving at that point (I finished it last night) and when I first cut the case parts I forgot to leave room for drawer handles inside the case. Last night was more milling and a little bit of cutting.
When looking for a thin piece of wood there are basically 3 options - buy thin lumber which is expensive, plane a thicker piece which can waste a lot of wood, or resaw which maximizes the use of the lumber. Basically what a woodworker means when they saw they resawed a piece of lumber is that they cut the wood into thin strips. A lot of times this is done on a band saw which has a blade that is a loop (think rubber band) with teeth on one edge. This can also be done on a table saw - usually by raising the blade to 1/2 the height of the wood and running the wood through twice. Or a combination of table saw and band saw can be used - run it through the table saw to get most of the wood cut away and finish up on the band saw.
The reason the band saw is the preferred method is the blade is much thinner so there is less waste. But because the blade is thinner it is harder to get a straight cut. It's a trade off and there are lots of products to help.
Since the piece I was resawing was not very wide (2") I just cut it in one pass on the table saw. Yes, I used a push stick! Next time I'll run the cut pieces through the planer to even them up.
On tap for next week -
First up is the nightlight since we don't want Snowflake to be a teenager before he gets it. I'm finishing it before I assemble it. I've got stain on all the parts. Next up is the finish coat. I'm going to go with polyurethane for that. I should get to this on Monday.
I've also done a little final sanding on the wall cabinet. I've also decided one of the doors needs a slight adjustment - it's rubbing on the bottom. That'll be a round of planing. Then I'll stain the walnut panels on the doors and the shelves which are also walnut. I think I'm going to finish it off with shellac.
Next up will be the foot stools. I've found a recipe for grain filler that uses pumice and boiled linseed oil. I've got the ingredients, just need to find a time to try it out. The grain needs to be filled because the hickory has open grain. Stay tuned for progress and pictures.
In class (Thursday nights till mid July) I've been working on hiker boy's advent calendar. Last week I remilled/recut the wood for the case. The design of this was still evolving at that point (I finished it last night) and when I first cut the case parts I forgot to leave room for drawer handles inside the case. Last night was more milling and a little bit of cutting.
- planed the stock for the drawer fronts
- jointed, planed and cut the stock for the door stiles and rails
- I may have to repeat this since some of the pieces sprung into a lovely curve after cutting
- jointed, planed and resawed (explanation below) stock for the drawer sides
When looking for a thin piece of wood there are basically 3 options - buy thin lumber which is expensive, plane a thicker piece which can waste a lot of wood, or resaw which maximizes the use of the lumber. Basically what a woodworker means when they saw they resawed a piece of lumber is that they cut the wood into thin strips.
 A lot of times this is done on a band saw which has a blade that is a loop (think rubber band) with teeth on one edge. This can also be done on a table saw - usually by raising the blade to 1/2 the height of the wood and running the wood through twice. Or a combination of table saw and band saw can be used - run it through the table saw to get most of the wood cut away and finish up on the band saw.
The reason the band saw is the preferred method is the blade is much thinner so there is less waste. But because the blade is thinner it is harder to get a straight cut. It's a trade off and there are lots of products to help.
Since the piece I was resawing was not very wide (2") I just cut it in one pass on the table saw. Yes, I used a push stick! Next time I'll run the cut pieces through the planer to even them up.
On tap for next week -
- recutting the pieces for the door frames
- cutting plywood panels for the doors, drawer bottoms and back
- milling and cutting pieces for the drawer supports/dividers
Tuesday, May 29, 2007
Lots of Progress
I have been remiss in not posting about all of the progress I've made in the last month of so. Here's a recap by project.
Wall Cabinet
The wall cabinet is ready for finish.
Foot Stools
The foot stools are ready for finish. I've been wondering about how to fill the grain, since the hickory has a very open grain pattern. While looking for something else in my stash of saved woodworking magazine articles I found one I'd saved on non-commercial grain filler. One option is to use pumice and boiled linseed oil. I've had a box of pumice sitting on the shelf for years (for use as a sanding agent when finishing) so I bought a can of boiled linseed oil. I'm going to give this a try before adding finish to the stools.
Night Light
Ready for finish. The panels look great (pictures soon). I'm going to apply finish before I glue up the box, so I have more control over the finish. I need to get this done ASAP since Snowflake made his appearance 3 weeks ago.
Hiker Boy's Advent Calendar
I've got the plan sketched out and started cutting the parts during my last couple of classes. I've got the sides of the case ready, although I may have to check that I left room to affix the back.
CD Holder
Adjusted the height of the dividers. It's ready for dadoes and rabbets.
Challenge Table
This has been garnering most of my attention. I started to include a report here, and then realized that it make this post extremely long. So, I'll post about that separately.
Thursday, May 3, 2007
Thursday - Class Night
I ran through all the work I had planned for class pretty quickly tonight.
Here's what I did:
Here's what I did:
- Cut extra panels sized to the nightlight light panels. I'll use these to back up the panels when I scrollsaw them this weekend.
- Cut the shoulders for the tenons on the table parts - aprons, top, stretchers.
- Planed the filler for the mortises, which I'll use to fill the first tenon while cutting the second in the legs.
- Cut parts for a new project - a small box for the bathroom to replace the basket that's we used have on the back of our toilet before we replaced the toilet.
- Trimmed the shelves for the wall cabinet.
Tuesday, May 1, 2007
Mortises, Mortises, Mortises

I'm working on cutting the mortises for the challenge table. There are three in each of the breadboard ends, two each in the front legs, and three each in the back legs. For those keeping count that's 16 mortises.
 I started cutting these on the dedicated mortiser at class. This is a large free-standing, foot operated machine. Like most of the equipment at the school it has been used and abused for years. (I can't find a picture of anything similar on the web. I'll try to get one on Thursday night.) Even with all of my careful setup, the mortises ended up off center - some worse than others. After careful examination of the mortises I decided that I wasn't happy with them. This left me with two choices - fill the mortises and recut the mortises or recut the legs. Since I'm trying to make this table as perfect as possible I decided to recut the legs, which I did at class on Thursday night. I'd only cut two of the mortises in the breadboards ends and those were acceptable so I didn't cut new breadboards ends.
I decided to finish the mortises on my router table. First up was the purchase of a new 3/8" straight router bit which I did a few weeks ago. I hadn't realized how dull my router bits are until I loaded this one up in my router and made a test cut. So I've added finding a service to sharpen my router bits to my to-do list.
With the new bit in the router, I set the fence. I'm using Norm's method of cutting each twice - running each face of the wood against the fence to ensure that the mortise is centered. This is possible because I haven't yet cut the tenons, so I'll be able to create those based on the thickness of the mortises. Last night I milled the remaining mortises on the breadboard ends. Tonight I finished marking the mortises on the legs, and began the cutting. I decided to start by drilling out most of the waste out with my drill. I chucked a drill bit which is slightly smaller than the final width of the mortise into my drill and started drilling.
I thought I'd carefully measured the depth I needed, but clearly I should have triple-checked it. The drill went completely through the leg! This wouldn't have been that bad except that it chipped out the face which was intended to be left solid. After creating a plug to fill the errant hole, and readjusting which leg is which and which face is the intended outer face I got back to the job at hand. First up - remarking the drill bit, then after cutting a whole lot of holes - one mortise on each leg is 4 1/2" long.
Finally, after checking the router fence using a piece of scrap leg stock, I started working the mortises on the router table. It's going quickly since I've already removed the bulk of the waste. I've got 3 more passes to make on this face of the legs.
On the back legs there are two mortises which intersect - one faces the other back leg, the other faces the front legs. This leaves a very small section of wood on the inner corner of the leg and requires very careful cutting. In preparation for this I've milled a board to fill the mortise that's already been cut and support that small section of wood (come back later for a picture). That wood is a little too thick so I'll need to do some planing/sanding before I start on the other two mortises.
 When the router work is done, I'll clean up the corners with chisels. After that I'll be ready to start working on the tenons that will fit into those mortises. 30 days left....
Update 5/3 - Added pictures.
Monday, April 30, 2007
Wall Cabinet: Almost Done
I have made progress on the wall cabinet in the last week or so, but it has been agonizingly slow. After finishing the hinge mortises I began work on the stop and latch mechanism.
I added a thin stop, 1/16" thick, at the bottom of the cabinet. It's glued to the inside. I measured carefully, marked where it needed to go, and glued it in. And then I had to remove it and replace it. At this point I can't remember why.
The upper stop/latch mechanism is more substantial. It consists of a 3/4" X 1/2" X 3" block with two super strong magnets super-glued into it. The doors each have a magnet washer screwed into the inside corner. I wasn't paying enough attention when I drilled the recess for the magnet washers, and managed to get one on the hinge edge of the door instead of the non-hinge edge. That happened to be the first one and I'd used super-glue to attach it. That boo-boo is now covered with a circle of veneer.
Again I carefully marked and measured the location of the stop block/latch on the inside of the cabinet, and transfered the measurements to the top. I'm attaching the block with screws from the top. The holes are then filled with plugs. So in attempt number 1 I drilled the pilot holes, applied glue to the block, screwed it in, clamped it for good measure and left it to set.
The next day I took off the clamps and closed the doors to check on the alignment. Imagine my surprise when the doors wouldn't shut. I quickly surmised the the problem. When I transfered the measurements from inside the cabinet to the top, I forgot to take into account that the screw holes need to be in the center of the block. The line I'd transferred and drilled along was the marking for the front of the block - not the center.
Fixing this required - drilling out the plugs, removing the screws and sawing off the block. After constructing another block and marking the lines again, I screwed on the block - no glue this time - as a dry fit. The fit was perfect so I removed the block, added glue and screwed it back into place. And just in case I decided to wait before plugging the screw holes. I did super-glue in the magnets, though. All looked good, and I headed upstairs for the night.
Next time I made it into the shop, I discovered that gravity had been at work. The magnets in the stop/latch are recessed into flat bottomed holes. When the stop is attached to the cabinet they are on edge. When I'd left the shop after attaching the stop and gluing in the magnets I'd left the cabinet upright. One of the magnets had not set before I left and had slid out so that it rested at about a 45 degree angle to the block - and then it set. This was just not going to work because the door couldn't shut with the extra impediment of the angled magnet.
My first attempt at a fix was to cut off the portion of the block with the angled magnet and replace just the portion. This proved to be impossible to do well given the limited space inside the cabinet. So I unscrewed and sawed off block #2.
With block number 3, I first dry fit it to ensure it's correct placement. Then glued in the magnets with it independent of the cabinet. And finally glued and screwed it into place in the cabinet. Once it was I added the plugs.
As they say third times the charm.
All that is left to do if finish sizing the shelves. Although I built the cabinet according to the plans, the shelves are too wide! At the current width there is not enough clearance for the doors to shut when the shelves are in place.
Other than finish, and a little sanding, the shelf sizing is the last work to do on the cabinet.
Now I just have to figure out what to do with it. I built it for the experience, not with any plan for its use.
Thursday, April 19, 2007
Wall Cabinet Progress
No pictures tonight, I'll try to post some tomorrow.
I've finished the hinge mortises.
Next step was to adjust the fit of the doors, which were too wide. In the grand scheme of things this is a much better option than too narrow.
While taking a break at work this afternoon, I'd read a discussion on the LumberJocks website about jointing the edge of a board with a handheld router as an alternative to doing it with a split fence on a router table. I've never done either but the fence which came with my router table has a split fence option. So, I decided to give it a try. I started on a piece of scrap. That went well, so I took a deep breath and ran the first door through. It wasn't perfect but it's pretty good. The second door looks even better. So now I have a new technique I can use.
After reattaching the hinges (while listening to, of all things, Donny Osmond on the radio!) I began work on the mechanism to hold the doors shut. I'm going to use rare earth magnets and magnet washers (basically thick washers that are attached with screws. I marked the doors, and drilled the holes for the washers with a forstner bit, and attached the washer in the first door. Amy came down while I was working on this and while I was explaining what I was doing I discovered that I had put the washer on the wrong side of the door. This wouldn't be too much of a problem except I'd decided to use a little super glue to help hold the washer.
I finished up the washer on the second door and the second washer on the first door. Now I just have to figure out how to mask the second washer on the first door.
The construction phase of this project is almost complete. I need to finish trimming the shelves for width (they're a little wide), ease edges on the doors and the case, and attach the block with the magnets which will act as the latch. That's it - the end is in sight.
Saturday, April 7, 2007
Progress Passover Week
 I was able to get shop time in between Passover preparations last weekend as well as on Monday, Tuesday and Wednesday (all vacation days). Thursday night was class night so lots of progress there, and tonight I got in another hour and a half. All in all a very productive week. Listed below is the progress by project.
Wall Cabinet
Construction on the wall cabinet doors is done (see below), the cabinet sides have been trimmed - they were slightly too tall, and I cut pocket screw slots to attach the sides to the the top and the bottom. I also eased the edges of the top, bottom and the shelves.
Night Light
All the parts are cut, except the sides. I've got the stock for the sides cut to width, but still need to cut a series of dadoes in them. I started to do this on Wednesday, but discovered to my great chagrin that I had cut the stock 1/2" too narrow. I'd cut it down on Tuesday and still had the cut off, so I glued that piece back on. Thursday night at class I ran it through the planer to clean it up so now I can cut the dadoes. Once the dadoes, 4 in all, are cut I can cut the individual sides from the stock. After that the major work will be scrolling the light panels.
Challenge Table
After much deliberation I decided to accept the Lumberjocks Thorsen Table Challenge. I acquired the stock and firmed up my plans on Wednesday. Much of my time at class on Thursday was spent cutting parts for the table. I've got legs, breadboard ends for the top, stretchers, apron stock which still needs to be cut into individual aprons, blanks for the shelf and top which need to be glued (the shelf is drying now), and the parts for the drawer. The picture above shows the apron stock, the legs, breadboards and stretchers.
Subscribe to:
Posts (Atom)